Create Document Text
Explanation
Many objects in IFS Applications supports usage of Document Text. Document
Texts are printed on the documents related to the object it's connected to. Some
objects support Document Texts on header and rows and some on the header only or
rows only.
When the text is linked to the header, the text is printed at the bottom of the
document. Text that is linked to a separate order line is printed underneath the
line in question. It is possible to change or remove a previously entered document
text.
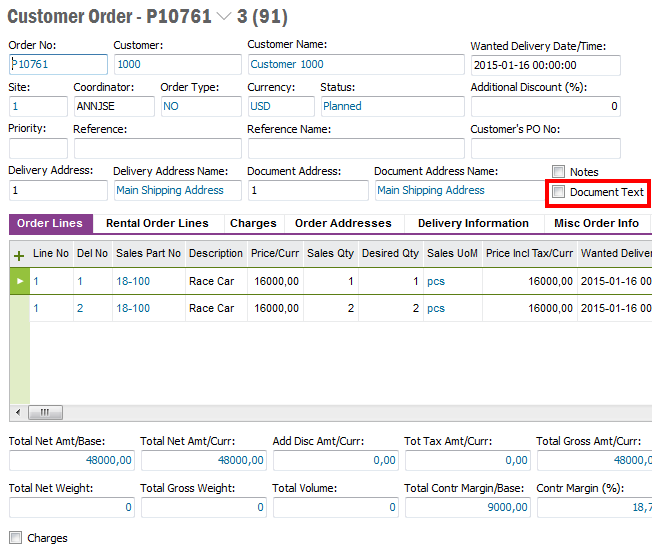
When a document text is linked to a header, the Document Text check box
on the header is selected. When a document text is linked to the line, the Document
Text check box on the line is selected. Observe, however, that check boxes do
not always exist.

Figure 1: Example Document Text Customer Order Page
Prerequisites
First the record that you are working on must support Document Texts. Not all
application objects do so the Document Text functionality is not available in all
pages.
For entering a document text in the header:
- The header must exist
- The output type with attached documents must have been entered in the
Document Text Administration/Output Types
tab.
- If a standard phrase should be added, the phrase must have been entered
in the Document Text Administration/Phrases
tab.
For entering a document text on the line:
- The header and at least one line must exist
- The appropriate line must be selected.
- The output type with attached documents must have been created in the
Document Text Administration/Output Types
tab.
- If a standard phrase shall be added, the phrase must have been entered in
the Document Text Administration/Phrases
tab.
System Effects
The document text is then printed on the documents that you have specified for
the output type. The document text is printed at the bottom of the document when
it is linked to the header and underneath the line in question when it is linked
to the line.
Window
N/A
Related Window Descriptions
N/A
Procedure
Entering a document text on the header.
- Place the cursor in the header. Right-click to open the context
menu and choose Document
Text.
-
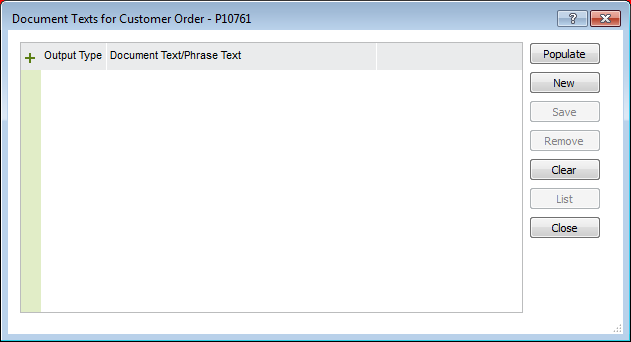
The Document Text
dialog box will be opened.
- Click New.
- Select Output Type by using the List button.
- In the Notes column, enter the text to be printed or use the List button to select an existing phrase.
- Save and close the window by clicking Save and Close buttons
respectively.

Figure: Document Text dialog box.
Entering a document text on the line.
- Select the appropriate line on which you want to enter a document text.
- Right-click to open the context menu and choose Document
Text.
- Click New.
- Select an output type by using the List button.
- In the Notes column, enter the text that will be printed, or use
the List button to select an existing phrase.
- Save and close the window by clicking Save and Close buttons
respectively.
Removing a document text from the header.
- Place the cursor in the header. Right-click and click Document Text
to open the Document Text
dialog box.
- Populate to view the existing document texts.
- Select the line you want to remove and click on the Remove button.
- Save and close the window.
Removing a document text from the line.
- Select the proper order line.
- Right-click and click Document Text to open the
Document Text dialog
box.
- Populate to view the existing document texts.
- Select the line that you want to remove and click on the Remove button.
- Save and close the window.

